Campaign Setup and Variable Mapping
The first step in creating a campaign is defining the content. Since campaigns rely on pre-approved templates, this step involves selecting a template and filling in its dynamic parts (variables) with specific data for each recipient.
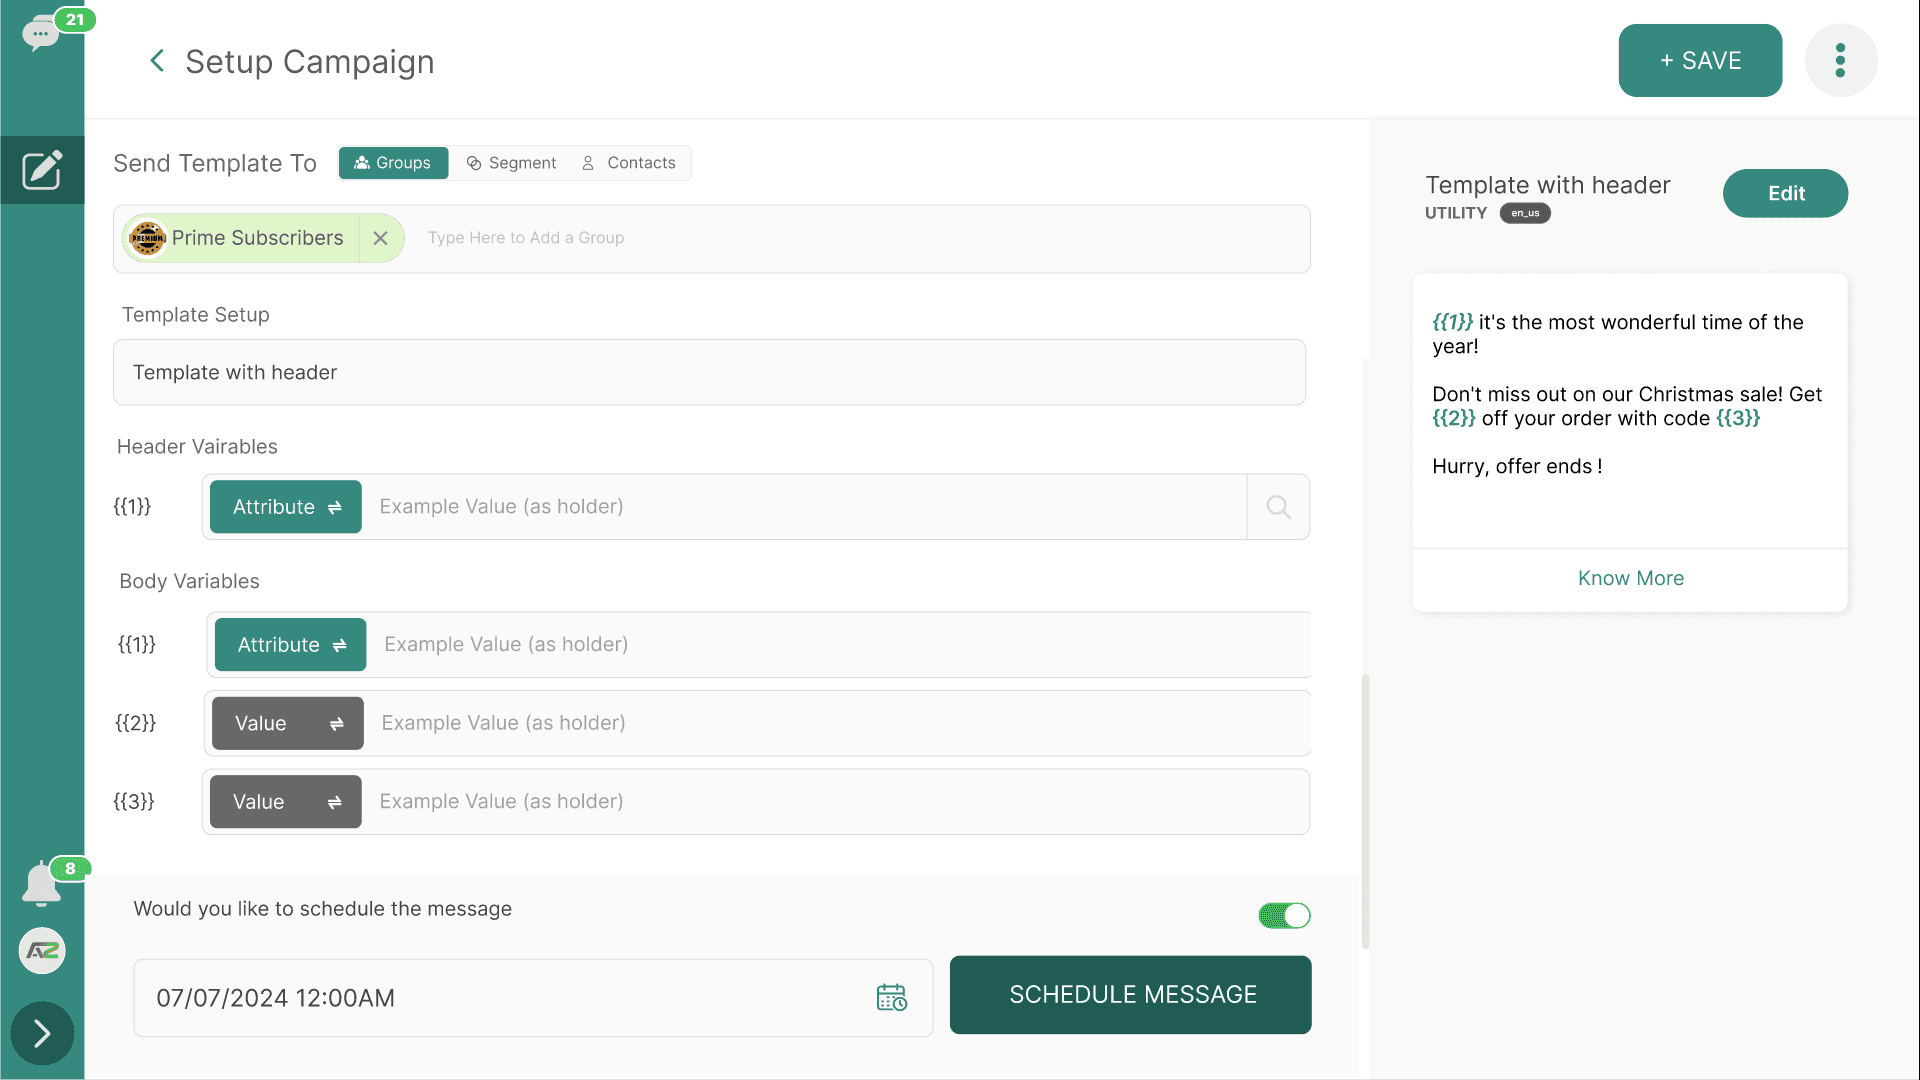
1. Selecting the Template
- Navigate to Campaigns > Add Scheduler (or
/setup-campaign). - Provide a Campaign Name for your internal tracking (e.g., "Black Friday Promo 2023").
- In the Template setup, open the dropdown menu.
- You will see a list of your APPROVED templates. (Templates in Pending, Rejected, or Paused states cannot be selected).
- Select the desired template.
- The WhataTalk interface will generate a preview of the template on the screen, showing exactly where the variables (like
{{1}}) are located in the text or header.
2. Configuring Variables
This is the most critical step for personalization. If your selected template contains variables ({{1}}, {{2}}, etc.) in the header, body, or buttons, you must tell the system what data to insert into those placeholders for each contact.
Header Variables
If your template uses a media header (Image, Video, Document), you must define what file will be sent.
- Static Upload: You can upload a single image/file that will be sent to everyone in the campaign (e.g., the Black Friday sale banner).
Body Variable Mapping
For the text variables in your template body (e.g., Hello {{1}}, your order {{2}} is ready.):
You have two main options for mapping each variable:
A. Map to a User Attribute (Dynamic) This inserts data specific to each recipient.
- Next to
Variable {{1}}, select "User Attribute" from the mapping type dropdown. - Select the specific attribute, such as First Name.
- Result: If sending to John and Sarah, John receives "Hello John", Sarah receives "Hello Sarah".
B. Enter a Custom/Static Value This inserts the exact same text for every recipient in the campaign.
- Next to
Variable {{2}}, select "Custom Value" (or "Static Text"). - Type the value, such as "in our downtown store".
- Result: Everyone receives "...your order in our downtown store is ready."
Fallback Values (Crucial)
What happens if you map {{1}} to "First Name", but a contact in your list doesn't have a first name saved in their profile?
You must provide a Fallback Value (sometimes called a Default Value) to ensure the message still reads naturally.
- Example: For
{{1}}(First Name), set the fallback to "Customer" or "Friend". - Result: If John has a profile, he gets "Hello John". If an unknown number is in the list, they get "Hello Customer". Without a fallback, the message might fail or look broken (e.g., "Hello , your order...").
Button Variables
If your template includes dynamic URLs in the Call-to-Action buttons (e.g., a link to https://mysite.com/track/{{1}}), you must map this variable just like a body variable.
- Often, you map this to a custom attribute like
Tracking_Numberor a specificCart_URLfor abandoned cart campaigns.
3. Reviewing the Setup
Before moving to targeting, carefully review the configuration.
- Check the preview panel to ensure the variables are mapped logically.
- Ensure fallback values are appropriate for the context of the message.
- Verify any attached media is the correct file.
Once the content is fully configured, proceed to the Targeting phase to select your audience